pulsar
Network footprint scanner platform. Discover domains and run your custom checks periodically.
Basic Usage Guide
Recommended workflow
- Start off with adding a new asset to the console
- Run a passive discovery scan (active option disabled)
- Mark all false positives in NETWORK tab
- Run an active scan
- Review and export scan results
- Start periodic scans by running it again with Repeat scan enabled
Asset view

Adding an asset
An Add button (1) allows for creation of new asset object. An asset definition includes:
- Name - A short name of an organization i.e. “ACME INC”
- Domain - A root domain used to start enumeration (need to be a resolvable FQDN)
Scanning an asset
A Scan button (2) initiates scanning process and opens up a following policy configuration window:
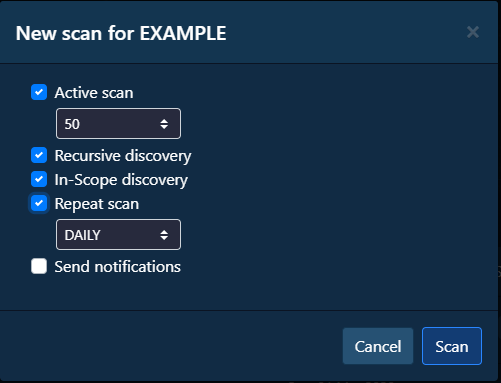
Policy settings include:
- Active Scan - Defines if active scanner plugins should be enabled i.e. Nmap scan
- Ports - Defines how many top network ports should be scanned (Nmap –top-ports argument)
- Recursive discovery - Defines if recursive plugins should be enabled i.e. Reverse DNS
- In-Scope discovery - Defines if scanner should stick to asset root domain scope (Disables TLD expansion)
- Repeat scan - Defines if periodic scan tasks should be enabled
- Schedule - Defines a period that scans will be launched
- Send notifications - Defines if email notifications should be sent on new results (requires email configuration)
After running a scan its icon will change to square sign, use it to stop the scan.
Exporting an asset
An Export button (3) allows for export of data in following formats:
- CSV asset data dump
- JSON asset data dump
- MARKDOWN report
- PDF report
Examining an asset map
A Map button (4) allows for visualization of asset domains on a world map (country statistics).
An icon in top right enables full-screen map view.
Deleting an asset
A Delete button (5) allows for deletion of asset object and all related data. Aditionally, Schedule option allows for flushing existing periodic scan tasks.
Other views
Menu available at the top of the page allows for switchig views to Dashboard (6), Asset (7) and Network (8). Additionally, User (9) menu available at the top right corner points to user details screen including documentation links and REST API token.
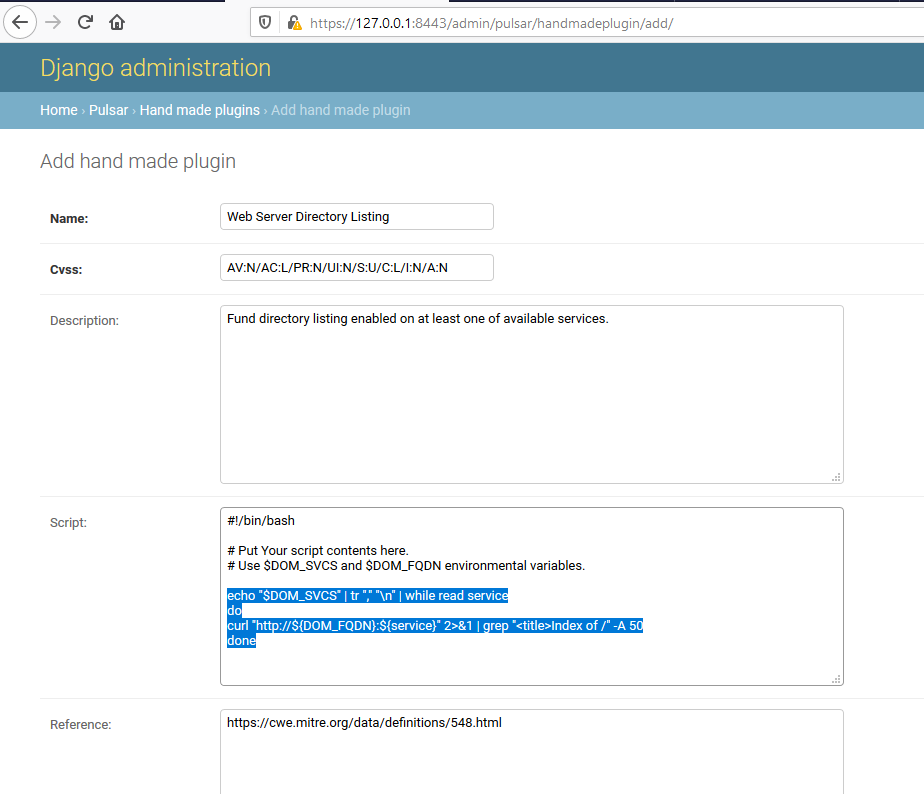
Custom scanner plugins
A Hand made plugins section available in Django admin console allows for creation of user defined plugins in form of sandbox bash scripts.
All custom plugins are triggered on any bash script output.
Be cautious when defining any custom plugins. This can not only break your scans but also cause security issues if done improperly. See TROUBLESHOOTING.md for information on how to test custom plugins in sandbox.
Example plugin configuration:
Custom scanner settings and variables
Settings such as Nmap scan flags are available in portal/pulsar/modules/scanner_utils.py in variable scan_settings:
scan_settings = {
    'heavy_processes': ['amass', 'zdns'],  # consider Nmap
    'cmd_timeout': '2h',  # linux timeout syntax i.e. 10s 10m 10h 10d
    'nmap_host_timeout': '10m',
    'amass_timeout': '20',
    'amass_flags': '-noalts ',
    'nmap_tcp_flags': '-Pn -n -sS -vv',
    'nmap_udp_flags': '-Pn -n -sU -vv',
    'resolvers': '1.1.1.1:53,8.8.8.8:53,64.6.64.6:53,74.82.42.42:53,1.0.0.1:53,8.8.4.4:53,64.6.65.6:53'
}
Collaboration groups
A Collaboration groups section available in Django admin console allows for creation of collaboration groups enabling users to an access to asset object.
In order to set up collaboration group, there are two steps needed:
- Creation of a new collaboration group and assigning specific users and roles to it.
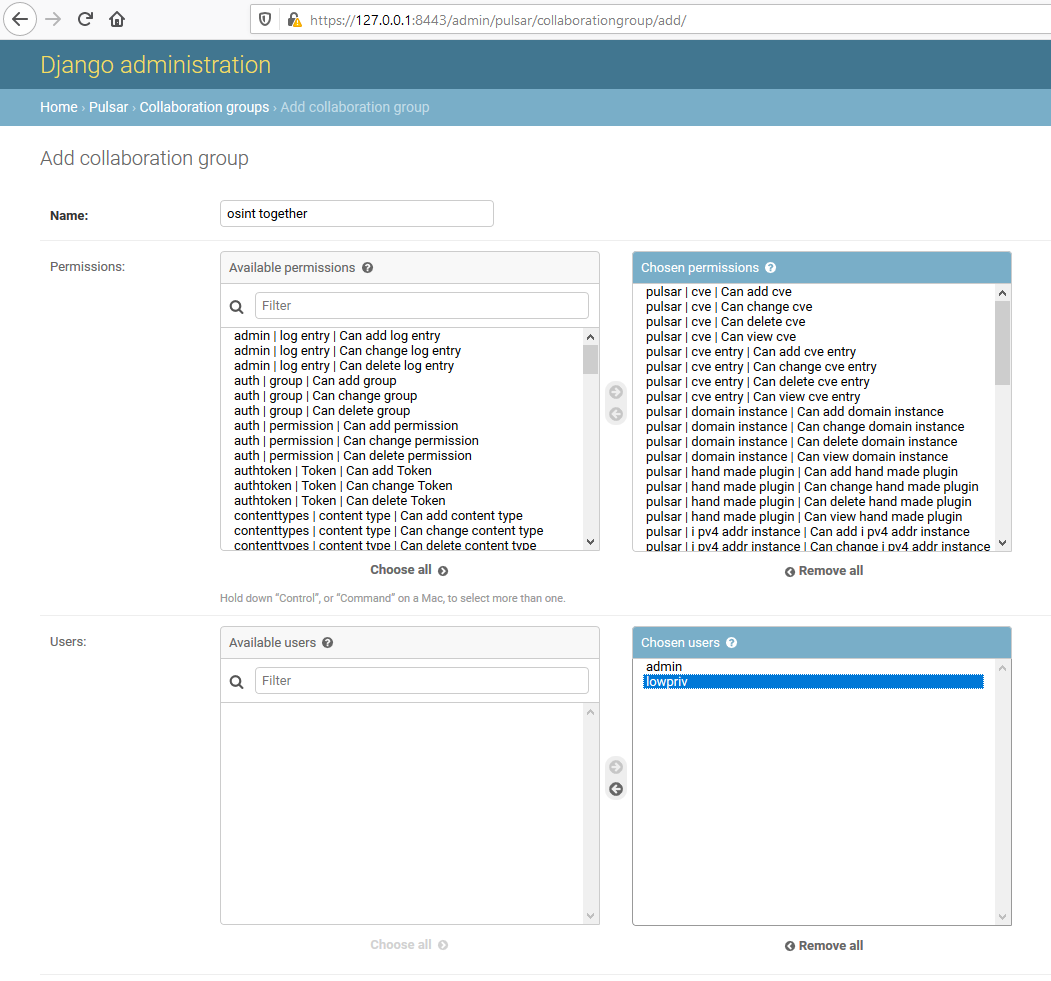
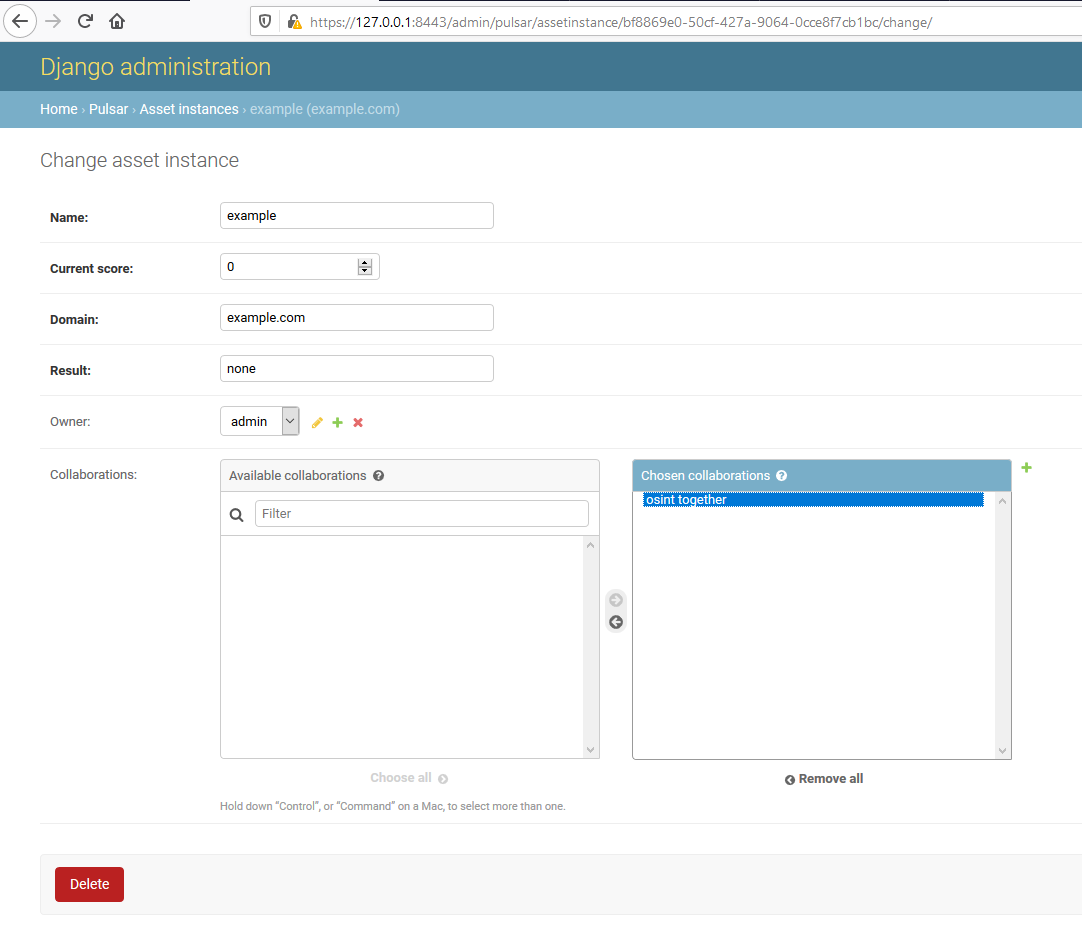
- Assignment of collaboration group to a specific asset.
External APIs integration
OWASP Amass used in this project support variety of different external REST APIs.
In order to use any of them, edit portal/pulsar/modules/amass-config.ini file before installation.
WARNING: API secrets placed in
amass-config.iniwill be stored on a sandbox container, along other (untrusted) installed tools which can pose a risk of secrets being stolen.